Showing posts with label interior. Show all posts

Thursday, 2 February 2012

Finished coffee table.

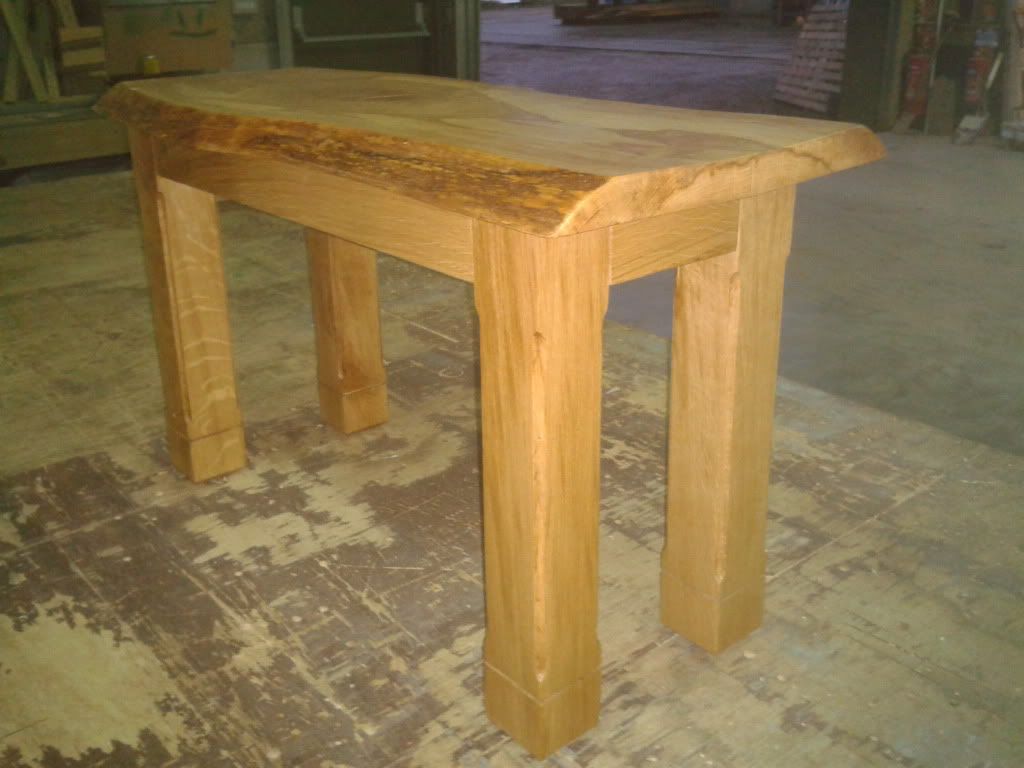
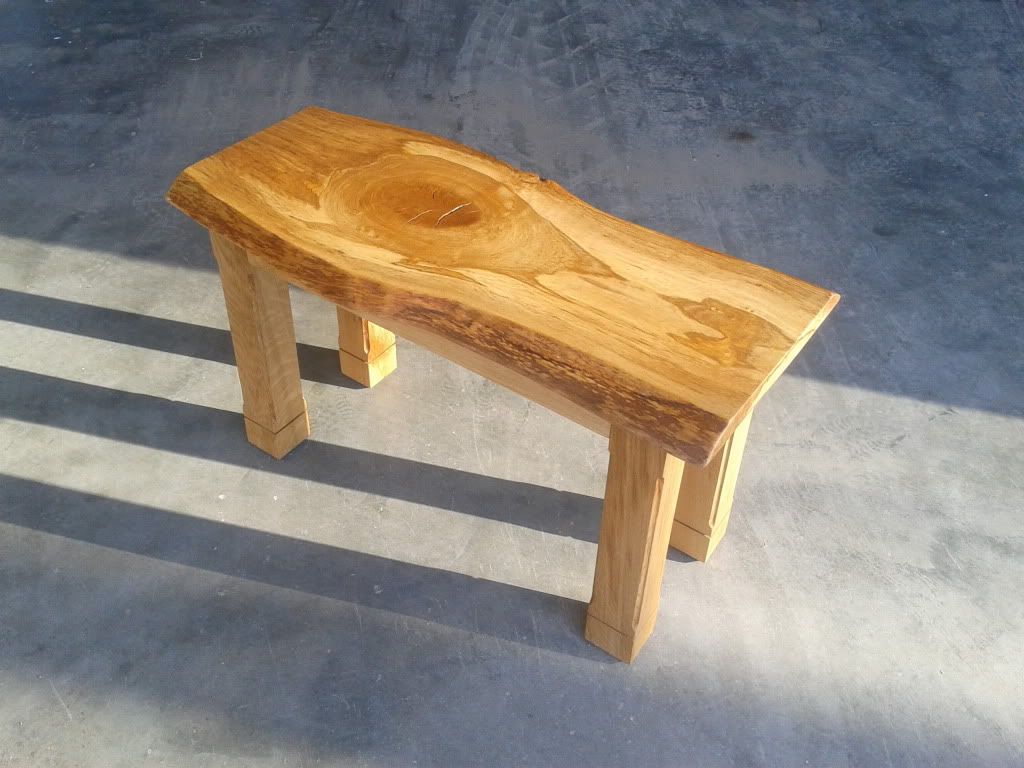
I have completed my most recent coffee table project with amazing results. A simple design with stand out features make this a coffee table that stands out in any room it will be placed. The huge knot that takes over the whole of the top is a gorgeous feature that you just cant help but admire.


You can see in the sunlight that this coffee table is very unique. You can never get these colours and patterns in the same place like this again. The large knot really makes this coffee table. But looking round this piece you will see other amazing lines and colours throughout the whole table.


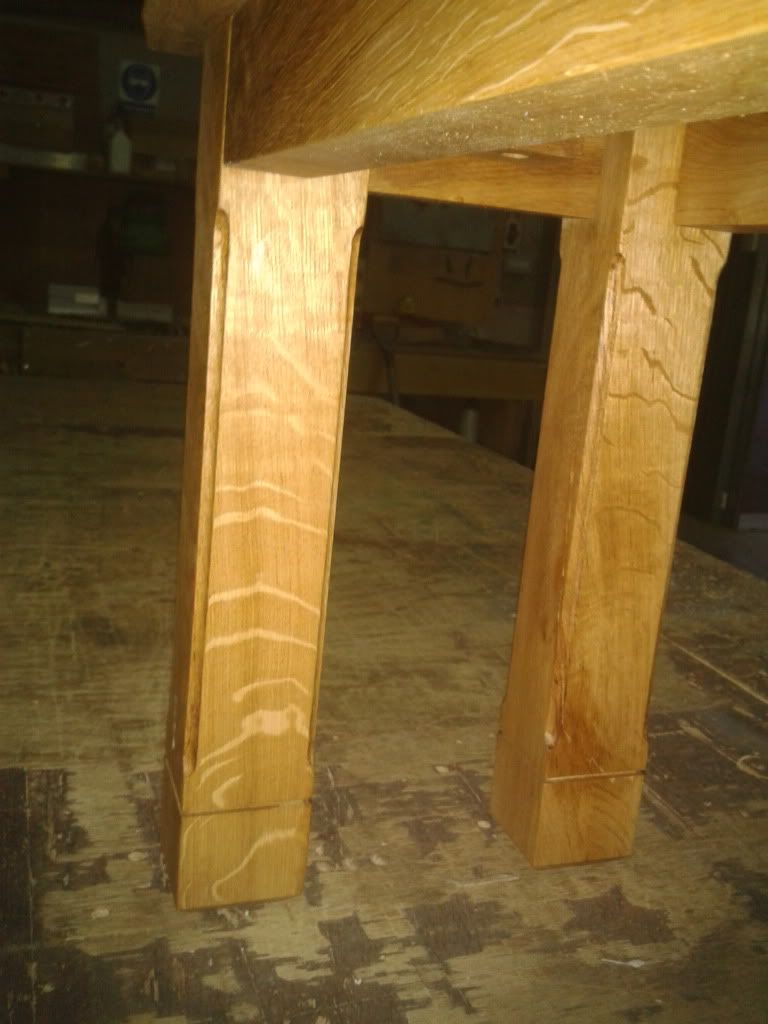
The rounded edges on the legs and angled feet give this table a simple but eye catching appearance. Hand cut mortice and tenon construction makes this a fully solid and sturdy coffee table. The gorgeous whole waney edged top is held down using screw and button method. This allows the top to naturally move without twisting the table out of square.


There are some very beautiful medullary rays (silver grain) running horizontally on the inside of the legs that just add to this tables large list of unique features.

I really enjoyed making this coffee table and I am over the moon with the end result!

Saturday, 21 January 2012

My love of Danish oil


Danish oil is my preferred finish to all my work. This is because the transformation it brings to a piece.

The images below shows what amazing features that danish oil can bring out in the oak. This waney edged coffee table top had many features to show off even before the oil was applied to it, but coupled with the oil the results were outstanding.


With the oil rubbed in with a microfibre cloth, just one coat (there will be 5 in total) transformed the piece with patterns, colours and lines that were unseen until the oil was applied. The golden colour which the oil has also gives off a warm feeling from the furniture once it is completed.


The results of Danish oil still amaze me. I love it and it is a bonus that it is also so easy to use.

Monday, 7 November 2011

Social networks!

I best add my information of my presence on social networks.

Facebook - Ryon Design

Twitter - @RyonDesign

Like/Follow me to see items currently in production and all my plans and ideas. Get your name down before anyone else for something you like before it goes up for sale!

Saturday, 3 September 2011

Frankenstein furniture.

As well as wanting to make gorgeous new oak furniture from scratch I have recently started thinking up ideas which will combine many pieces of furniture together to create something different. Not necessary beautiful furniture, again just going with a different feel.

I will soon be setting myself a small challenge to have a go at this idea. I am thinking everything I will use must be pre owned and only obtained at places like car boot sales, freecycle or homeless charities like Emmaus. A small amount of cash per project and a limited number of pieces to use.

So for example. I will have £20 to get 3 pieces of furniture from Sundays car boot sale. Then create something by combining them all together.

I am thinking this side of what I'm creating only using recycled materials. Nothing new at all. Apart from glue and maybe fixings!

Some very crazy things running through my head with this in mind at the moment! Lets get this started!

Wednesday, 13 July 2011

Coat Rack

After only just noticing that me and my partner have an ever increasing pile of coats laid across the top of our shoe chest in our hallway I thought the time has come to make a coat rack. I wanted to make something quick, simple, different and interesting. It didn't take me long to cut and shape something out. I chose a dried 30mm thick oak board with an attractive grain pattern. I shaped the corners different from each other also for something unusual. This is what I came up with:


Once sanded smooth I decided on only oiling the raised face side of the oak and the outside edge. A clear wax coat for the rest of it. The idea being a darker warm coloured face sitting on a lighter back. As if the front has been fixed on after.


I had this finished and waiting to go for a good few weeks while trying to find some hooks to use with it. I didn't want to go for new, bright and shiny hooks in a light finish. I was more looking for old, patina, worn, dull. At the start I was thinking a distressed bronze but after seeing a few examples I thought the golden bronze would not suit the look I was going for.

So a darker finish was the way forward. Many charity shop visits and car boot sales later nothing seemed to appear.

I had a massive stroke of luck when speaking with my partners mum about the hooks. She had an old coat rack in the shed with hooks matching what I was trying to find.  They were perfect. I could finally finish this small project that I though would take maybe two days to make, find hooks and put up. It was more like 6 weeks.

I gave the hooks a little scrub in some warm soapy water and dried them off thoroughly before mounting them. I decided on placing the hooks unevenly again for something different. And finally the finished project (before fixing to the wall) photographed by my partner Louise. (See her blog here http://www.dearestjackdaw.com/ )


Sunday, 5 June 2011

I am starting to design a few more pieces to build.

I have been drawing up a few designs lately for items such as a chest of drawers, bedside cabinets, and bed frames. I am considering making a whole set with the same design for a whole basic bedroom set.

The design I am considering is going to take a lot of time. Every face of every section will be detailed heavily to create a complex piece of furniture that will be amazing to just sit and look at.

This is going to take a long time!

Saturday, 28 May 2011

Using green wood issues.

The first 2 coffee tables I made were made using green oak off cuts. I cut them to size and left them to dry out more before I used them but I couldn't wait that long. I just wanted to build something I designed! But now I can see the issues that have developed which will now have to be sorted out. I spent a lot of time squaring every edge to sit perfectly to each other on the top so minimal joint lines were visible. When I finished the table everything was perfect. But now after 3 months of being in a room temp environment the heat has taken its toll on the water in the Oak that was still there when I made it. It caused everything to shrink which caused all the joints to open up as you can see from this picture. 


I have from this table learned that only seasoned wood will need to be used to make something that will not move in a room. The listed at least 12% MC (moisture content) in wood to be used for interior furniture construction is there for a reason. What happened here with the top shrinking is only 1 of many things that can happen from using green (wet) timber.

I have learned not to use green oak for my work even though I have a regular free off cuts supply
 of this ( A friend of mine has an oak framing business). I am keeping hold of the bits I can use still but storing them to dry them out after cutting them to approximate size so I could possibly use them in the coming years. Remembering the rule of thumb. Every half inch thickness should be left to dry for a year.

Monday, 23 May 2011

A few pictures now on the gallery page

I have put up 4 pictures of 2 coffee tables I have made in the gallery page.  I will upload a few of my other pieces in the next few days.