Showing posts with label ryon. Show all posts

Wednesday, 6 June 2012

Solid Oak Chest

Things have been a little quiet from myself for a while unfortunately. Many things have accounted for this including a big shape up in my place of employment, mountians of extra work in said employment, a house move and general life. I am suprised at how quickly time has flown by! I am a little disappointed at myself for letting my oak work live on a back seat and leaving it there for so long.

That time has now come to an end. I am back in the zone and scribbling down ideas and designs I'm going to tackle next and it is a great feeling. Why I let it go for these past few months I do not know!

So about this Oak chest.

I have a good friend that does genuine medieval reenactment and he casually asked if I can make a chest for him to carry all his armour, as he uses a large hold all bag at the moment which is not very authentic. So I agreed I would make him a chest. I set about with a few drawings and joint ideas to which he swiftly said no to. He wanted a very strong square box with a lid sat on top, but... with no joints that could be seen.

I suggested maybe a hidden dovetail joint which is not very 15th century I know, but it will be very strong and not visible like he wants. Downside to this idea was the 45 degree angle which the dovetails are cut into which was not used back then. I went through all the basic box joinery with him and he stopped on a lap joint and wanted that, which was easy for me but not very strong at all. So I then suggested fitting dovetails into the lap joint creating a lapped hidden dovetail joint.

A bit complex but ideal for what he wanted. Very similar to the hidden dovetail but modified to fit into a lap joint. The dovetails get hidden from view once fitted tightly together and the box from above looks lap jointed.

If I have lost you with all these joints I apologise. A quick run through with picture of what I did.

I started with these lovely air dried boards.
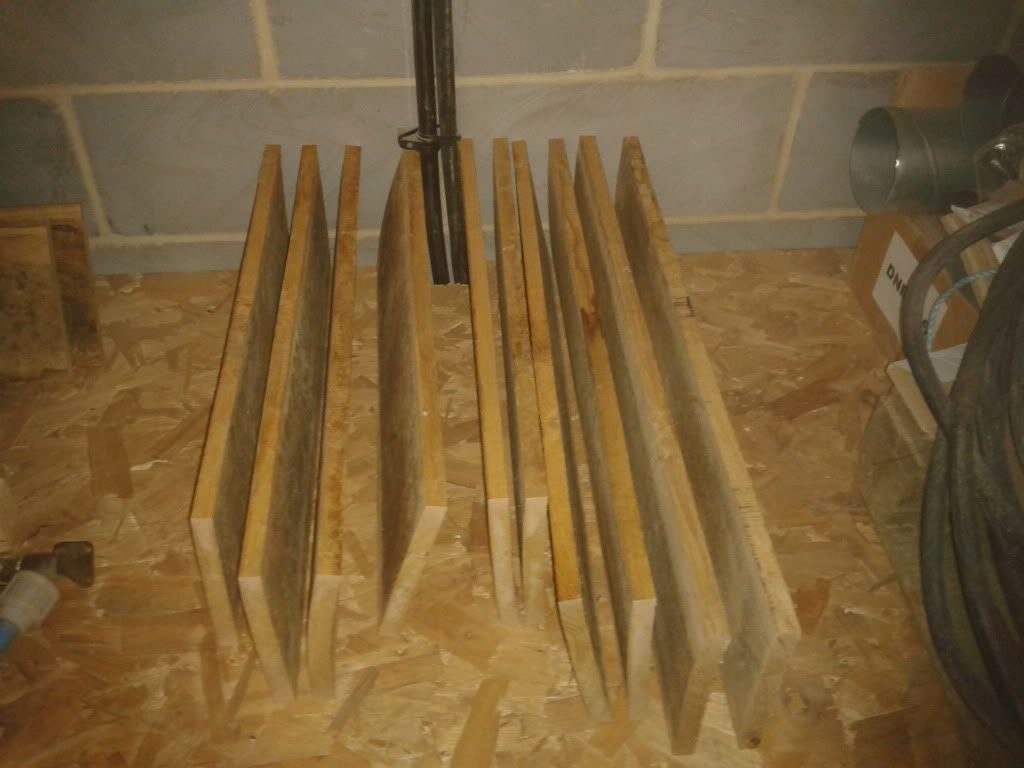

I then ripped down the boards and hand finished the edges for a perfect join and glued them up.


After sanding smooth and cutting to size I then set about marking the lapped hidden dovetails.


An example of how the joint works once chiselled out.
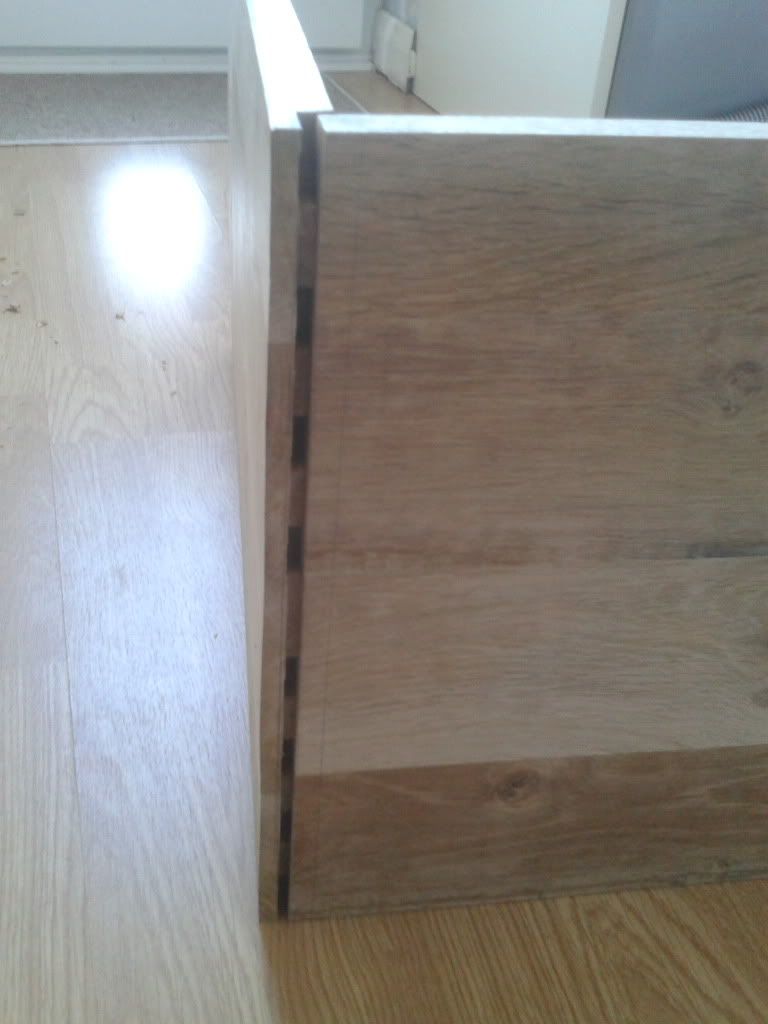

Once everything was cut out, I made the chest base which was cut to size and lap jointed to the bottom of the 4 sides. Everything fitted nice and tight so out came the glue and clamps to glue everything up.


After checking the squareness I letting it all dry over night. The next day came the first coat of oil and making the lid. (sorry no pictures of the lid making)
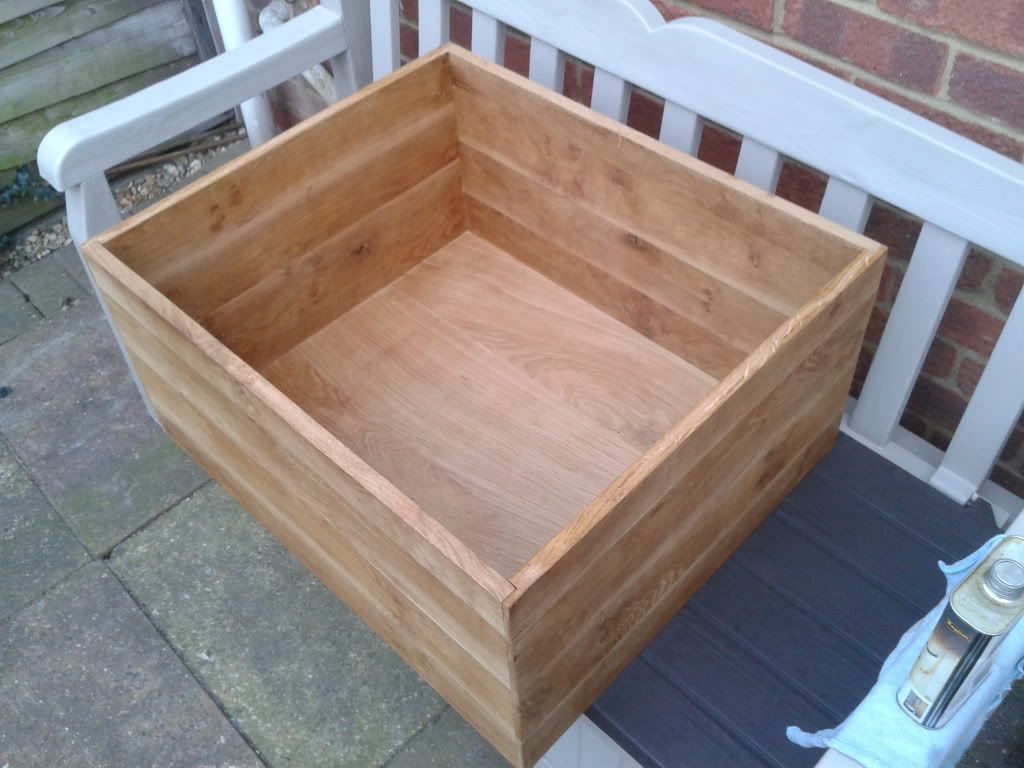


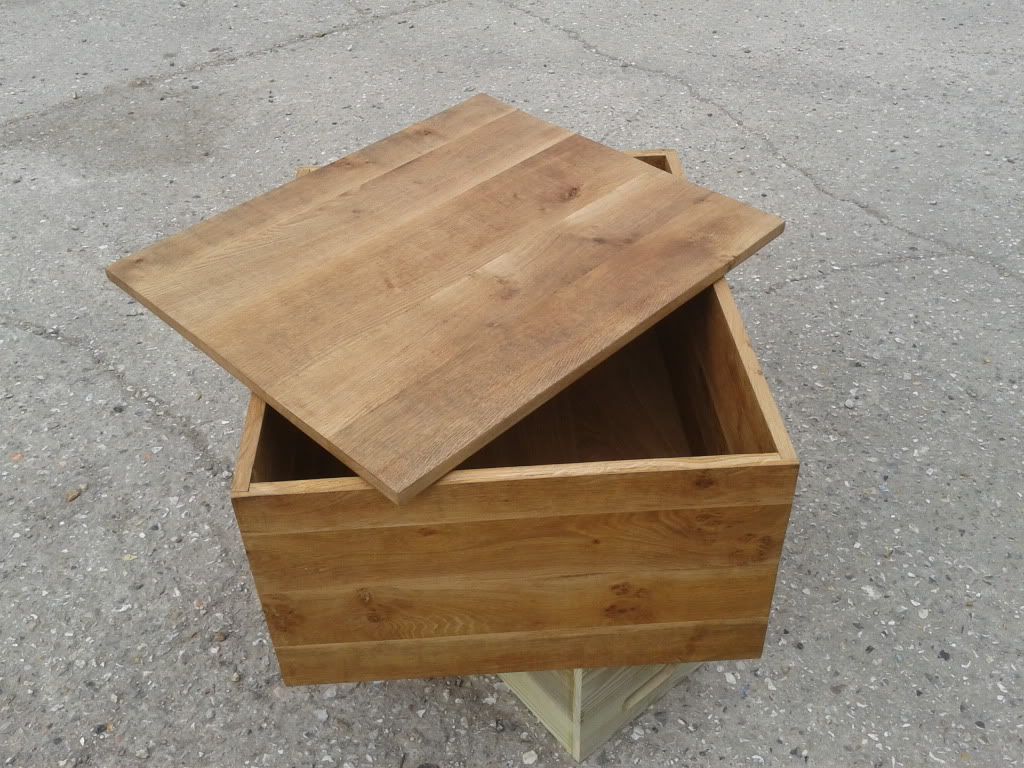
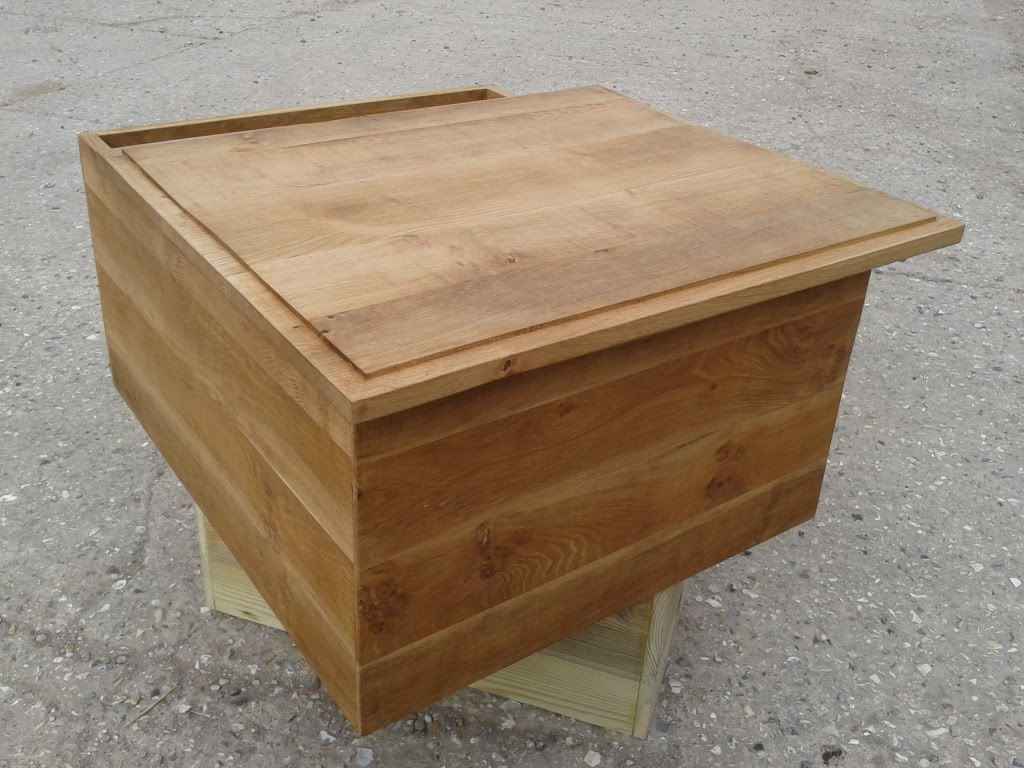
After everything was complete and 3 coats of oil were applied the end result was this.


The lid was slightly wavy which you can see in the pictures and my friend loved it.

I finished this the day before he took it to his first event this year which was a close call to get it done in time.

The idea I last heard was he wants to fit leather straping for hinges and a buckle type fitting to secure the lid down. I think once the leather is fitted it will totally transform this already very beautiful chest into something very unique which is my ideal finish to a project.

One last thing to do before it is finished. I am trying my hand at wood burning and engraving as he would like his genuine family coat of arms embedded into this chest as it is made to last. This chest might well be passed on through the years which makes me even more proud to have made this.

I will be sure to update this as soon as progress is made to it.

Monday, 7 November 2011

Social networks!

I best add my information of my presence on social networks.

Facebook - Ryon Design

Twitter - @RyonDesign

Like/Follow me to see items currently in production and all my plans and ideas. Get your name down before anyone else for something you like before it goes up for sale!

New Gallery Pictures

I have another coffee table in my gallery. This one is a definite one of a kind piece. Everything you see on the gallery page now is available to be made. Remember no two pieces will ever be the same and I want to keep my products as one of a kind pieces. Similar... but never the same.

As they are made to order anything and everything can be custom. Length, Width, Height, Finish, even the Design if need be.

Think of anything you want made. You know that you will never find what your thinking of in the shops. I could make those thoughts reality. That's what I want to do! I don't want to make bog standard furniture!


Lets create something amazing!

Thursday, 22 September 2011

Solid oak?

The term Solid oak in furniture should be as it sounds... Solid.

But...

I keep finding myself looking at handmade furniture in shops which are listed as a solid oak table or solid oak chairs that are not solid oak. Solid in my mind is made using one whole solid piece of timber, not many strips glued together to form a thicker piece.

This one table I have in mind was listed as solid oak. It was a lovely looking kitchen table, pretty grain patterns, a strong 2" thick top, and straight chunky legs. Very nice. But it was not solid like it says it is. Upon closer inspection every section of it was strips glued together. The whole table and it was £1300. I was a little disappointed to be honest, which I keep finding myself when looking around at "solid" furniture.

Maybe it is just because I know I use fully solid timber for my work and maybe expect things to be the same.

Quality made products will far exceed products of "not so good" quality. If any of you are out and about, have a closer look if you are thinking about buying solid wood items. Maybe you are totally happy with these types are products and if so, Fantastic. But just keep an eye out for things that are not what they say they are.

Saturday, 3 September 2011

Frankenstein furniture.

As well as wanting to make gorgeous new oak furniture from scratch I have recently started thinking up ideas which will combine many pieces of furniture together to create something different. Not necessary beautiful furniture, again just going with a different feel.

I will soon be setting myself a small challenge to have a go at this idea. I am thinking everything I will use must be pre owned and only obtained at places like car boot sales, freecycle or homeless charities like Emmaus. A small amount of cash per project and a limited number of pieces to use.

So for example. I will have £20 to get 3 pieces of furniture from Sundays car boot sale. Then create something by combining them all together.

I am thinking this side of what I'm creating only using recycled materials. Nothing new at all. Apart from glue and maybe fixings!

Some very crazy things running through my head with this in mind at the moment! Lets get this started!

Wednesday, 13 July 2011

Coat Rack

After only just noticing that me and my partner have an ever increasing pile of coats laid across the top of our shoe chest in our hallway I thought the time has come to make a coat rack. I wanted to make something quick, simple, different and interesting. It didn't take me long to cut and shape something out. I chose a dried 30mm thick oak board with an attractive grain pattern. I shaped the corners different from each other also for something unusual. This is what I came up with:


Once sanded smooth I decided on only oiling the raised face side of the oak and the outside edge. A clear wax coat for the rest of it. The idea being a darker warm coloured face sitting on a lighter back. As if the front has been fixed on after.


I had this finished and waiting to go for a good few weeks while trying to find some hooks to use with it. I didn't want to go for new, bright and shiny hooks in a light finish. I was more looking for old, patina, worn, dull. At the start I was thinking a distressed bronze but after seeing a few examples I thought the golden bronze would not suit the look I was going for.

So a darker finish was the way forward. Many charity shop visits and car boot sales later nothing seemed to appear.

I had a massive stroke of luck when speaking with my partners mum about the hooks. She had an old coat rack in the shed with hooks matching what I was trying to find.  They were perfect. I could finally finish this small project that I though would take maybe two days to make, find hooks and put up. It was more like 6 weeks.

I gave the hooks a little scrub in some warm soapy water and dried them off thoroughly before mounting them. I decided on placing the hooks unevenly again for something different. And finally the finished project (before fixing to the wall) photographed by my partner Louise. (See her blog here http://www.dearestjackdaw.com/ )


Monday, 11 July 2011

Bench refresh.

I was asked by my partners Gran to take a look at her garden bench as she was worried about it collapsing if someone sat on it. Sure enough it wouldn't have taken much for it to collapse under a little weight. The bench itself had two cast iron ends with wooden slats bolted to each of the ends. The slats were rotting at the bolts which meant it was not very safe at all. On top of this many of the slats had been replaced before, but only with softwood.


So I obviously said I would sort it out for her. I didn't want to have it collapse with her sitting on it one day very soon. I showed her what the problem was with it and she gave me permission to do what I wanted.

I had no doubt that Oak would have looked great with the black cast iron ends.

We were invited up for a lovely roast dinner at the weekend so I thought I would get the bench done while we were there and this is the result:


Looking fresh, bright and new. It has made a massive difference to the overall appearance and strength using Oak. I used new stainless steel dome headed bolts and used a wax coating on the end grain to seal it up a little. I left the rest as it was as the oak I used was green. I just scrubbed it with a hard brush and some warm water. I used green oak as the bench is always going to be outside in the elements,so with no finish applied the oak will not require any maintenance and will turn a lovely silver over the years.

I am very happy with the way it has turned out and now safe in the knowing that my partners Gran will have a solid garden bench to sit on with friends while they enjoy the sunshine and the garden.

Sunday, 5 June 2011

I am starting to design a few more pieces to build.

I have been drawing up a few designs lately for items such as a chest of drawers, bedside cabinets, and bed frames. I am considering making a whole set with the same design for a whole basic bedroom set.

The design I am considering is going to take a lot of time. Every face of every section will be detailed heavily to create a complex piece of furniture that will be amazing to just sit and look at.

This is going to take a long time!