Thursday, 2 January 2014

2014 Is Here! What Of Last Year?

So 2014 is now here!

My plans for the last year didn't really go as I would have liked. I planned to have a full range of products ready to go. This didn't really happen but I still got a good handful of designs and items sketched up, worked out and finally built. But unfortunately many half finished projects.

This was one of my bad points of last year. Being fully focused on a project then I would have a brainwave of something else that I liked the thought of and I started pursuing that instead. This had me sometimes using timber from something I'd previously made already which then put that build further behind than it was.

ANYWAY!

I am now looking at the positive builds that came out of last year that are going to be part of my range of products being up for sale this year.  With more to come.

The best (and admittedly most stressful) project was my 3 Tier Solid Oak Shoe Rack.


This has 40x40mm framework, 3 tier slatted shoe rack, a slatted bottom shoe box to the right hand side with my signature design lift off lid, a dovetailed drawer at the bottom, again with my signature design and slatted bottom and finally all sides paneled.

This build proudly boasts:

A size of 1350mm x 650mm x 400 (L x H x D)
64 mortise and tenon joints, 
12 dovetail halving joints, 
2 dovetail housing joints, 
28 channels cut for the paneling to sit in
Finished in 5x coats of Danish oil and a generous coat of clear paste wax.

I chose to use slatted surfaces for everything for air circulation and didn't use one screw in the whole build.

There were a few stressful moments in this because I kind of made this up as I went along. It started life as an open sided 2 tier rack with a removable storage box at the bottom. I soon thought it is a little bit to normal for my style of work. So I added a drawer instead of a box... Then I added the box on the side... Then I decided I wanted to close off the ends and back with panels... Then I wanted to add my geometric style design to the drawer front and wanted to sink it into the framework as it closed to finish flush... I then added the same design to the lift off lid on the shoe box.

Every time I added something in it messed with something I had already fitted. But I got around it all and finally finished with the above results. It really does stop people as they pass it and they have a good look and play with the drawer.

Next!

My next idea that I stuck with from the design sketch to the end was a set of drinks coasters.

Set Of 4 Solid Oak Interlocking Geometric Drinks Coasters   


These were a thought I had originally for an extra gift to include with this coffee table design of mine.


Each of the coasters have their own unique shape meaning they will only fit together one way and once locked together they made one big coaster for plates or bowls etc.

This is basically my take on the puzzle piece.

I soon found out after completing my first set that they are VERY time consuming. All edges are hand finished with a chisel to eliminate any possible large gaps which may occur if using just a bandsaw. Plus these coasters are 19mm thick and the bandsaw really doesn't like it that much!

As the time it takes to make a set of these is very high for what they are I decided to make them as a separate product. These are currently available from both my Etsy and eBay shops for around £20 (excluding postage costs).


These are the best of the bits I finished last year when I found the time in my busy day to day life to work on my own projects. As I work full time with hectic deadlines and silly overtime hours I feel I missed out on many days and hours that I could have been in my own little workshop building the things I have thought up.

I have big plans for this year.

I want to have my furniture in shops! 

I'm plan to get my range up together and go and see all my local furniture shops and see if I can get myself a spot in their shops.

I also plan on having more products available in my online shops as well as scheduling in a day or two every week or so for social media updating. Meaning you will hear from me and about my projects more regularly than what I have previously updated. On my Blog, Twitter, Etsy, Facebook and my website!

Here's to the coming year!

Wednesday, 27 February 2013

New website!

I have finally got a website for my work!

www.ryondesign.co.uk

It used to take you here to my blog but not any more! I has been a very long time coming but the wait is now over. It will be updated on a regular basis when I complete work and when new exciting things come about.

Watch this space!!


Sunday, 13 January 2013

It's been a long time...

It has been a long time since I've blogged about anything. What I've been building, designing, creating or just doing in general.
Since my last post (31st July 2012) I have moved house (rented) 3 times which was not stressful at all!
One of the properties had rubbish heating that cost the earth to run. It was so cold you could see your breath in the air while watching TV. It had a serious damp and mold problem, kitchen cupboards stank, we had vermin living in the loft and our agents did nothing to help us.
So in all a terrible experience. It is worth mentioning we viewed and moved in when the summer was here so none of the problems showed until we were there.
So fighting our agent and trying to sort our living situation took priority so my furniture making suffered.
I managed to start a few new projects but I never really got stuck in due to the living arrangements.
But a good thing to come out of the time missed was I now have my own small workshop that I am currently working away in. In which I will build up my machines and hand tools with every sale of my work.
I have opened an eBay account that will turn into a full shop with more products and items for sale and I am now on instagram also.
This year is my year! I will have more products available, more stuff for sale and more people will know my work and that I exist in the world.
So. Watch this space!

Tuesday, 31 July 2012

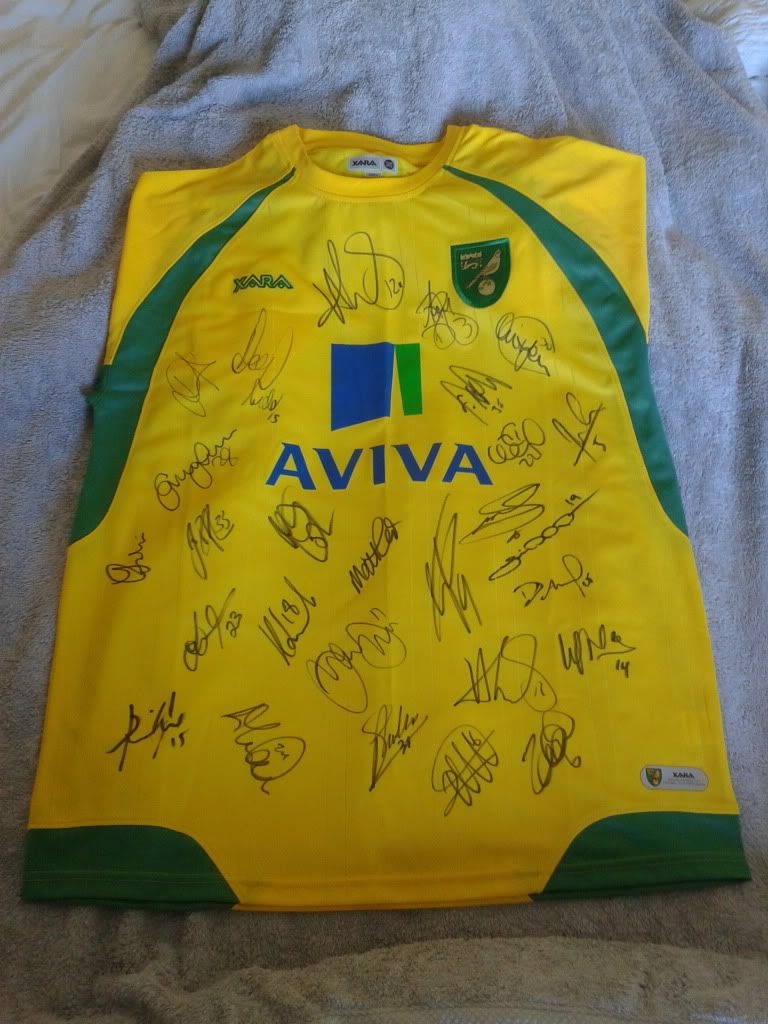
Bespoke Oak Framed Norwich City Shirt

Over the last few months I have been designing and making a 2" deep box frame to display a signed Norwich City football shirt. It has taken a few months to build because I was secretly making it for my mum, she had no idea! This meant I had no real deadline to meet. When I had other jobs to do this project kind of got pushed to the side for a while until I had some free time to work on it.

The idea was to make a deep, breathable frame for the shirt to hang freely inside. I wanted to make sure no condensation could build up on the inside of the frame as this would harm the shirt.

A little about the shirt.


My mum is a HUGE Norwich City fan. For her birthday last year she was given the shirt by a friend of hers who managed to get it signed by the complete premier league promotion winning squad. Her friend that got the shirt is a cousin of the Goal keeper. So this is a very special shirt and I felt it needed something interesting and eye catching to display it in.

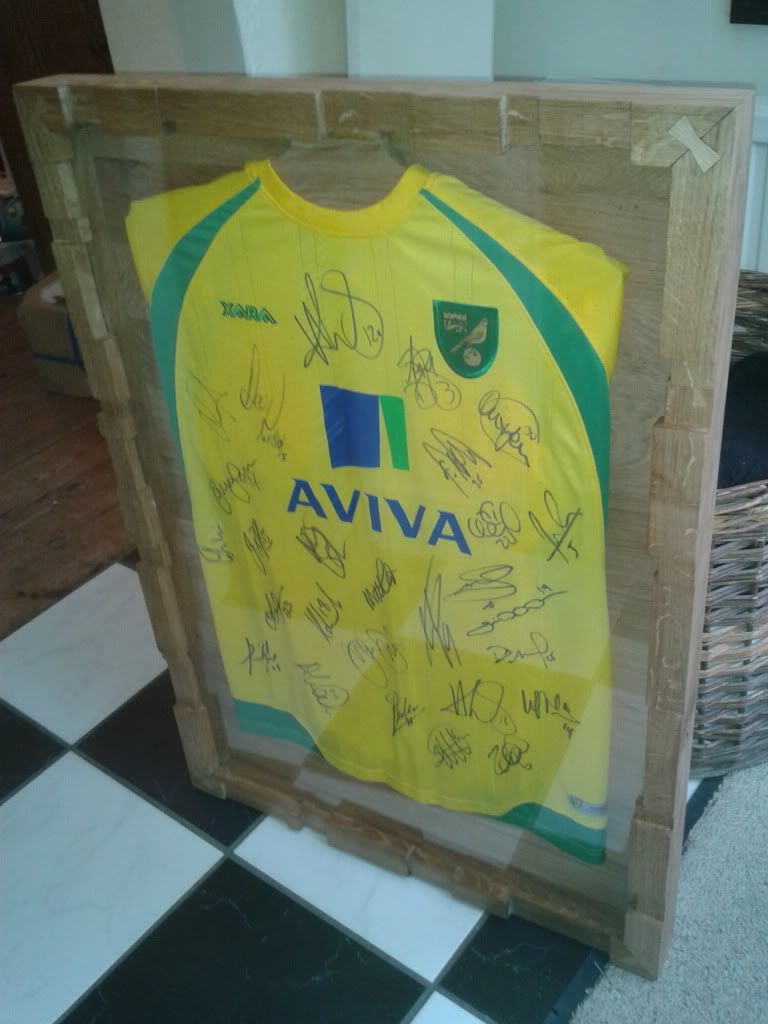
This is what I came up with:


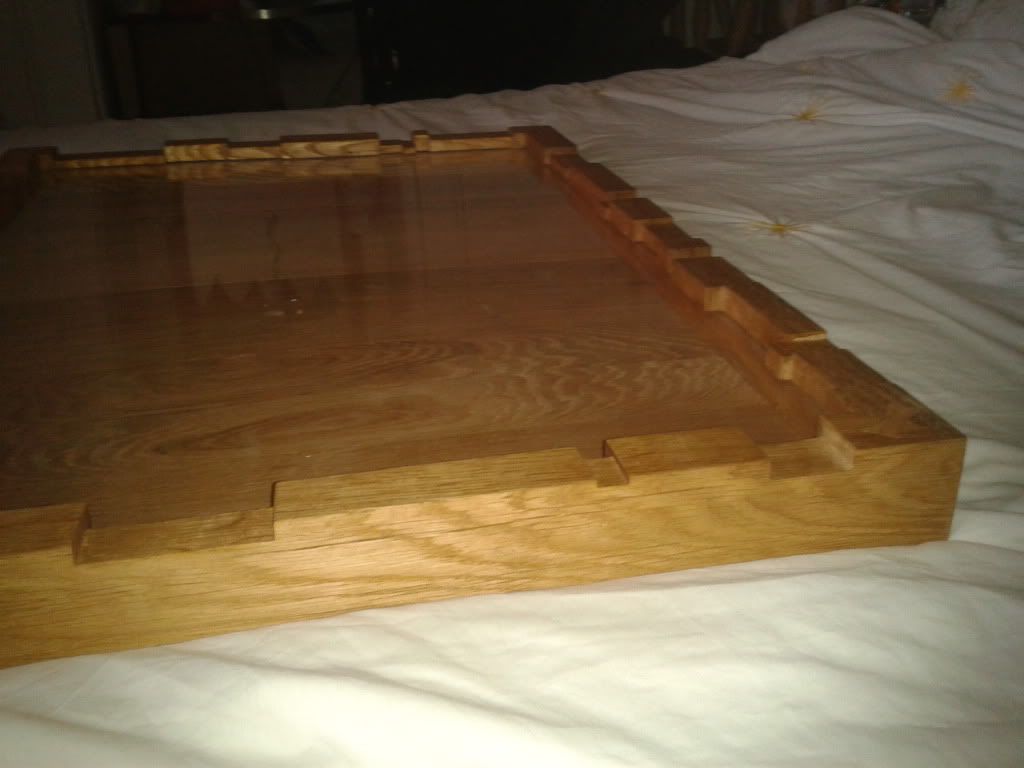
Following my signature style of work, I used my multiple changing cube design, hand cut and finished from solid pieces of oak. I cut a unique profile into the oak to hold the clear perspex into tightly so it cannot move, a 1 inch thick area for the shirt to hang freely inside of and a 3mm rebate for a backing board.

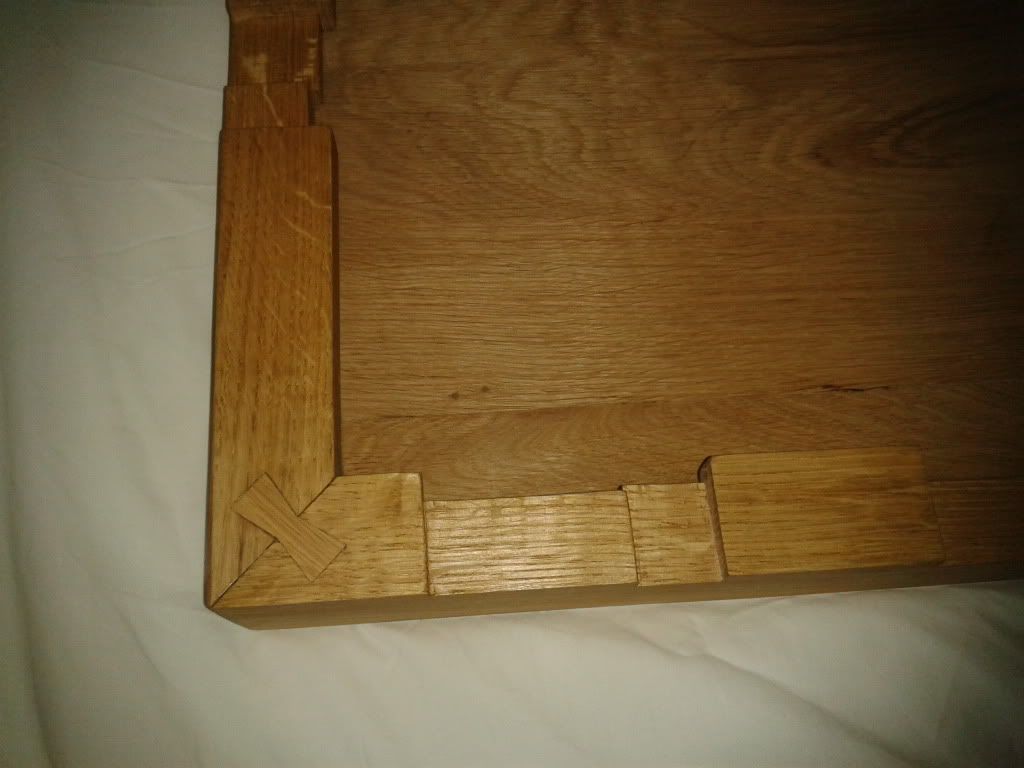
I used a 45 degree angle on the corners with a hidden spindle inside each joint for extra strength when gluing. I also chose to use a decorative joint called a butterfly key. These small keys lock both sides of the joint tightly to one another and stops them from separating while looking gorgeous.

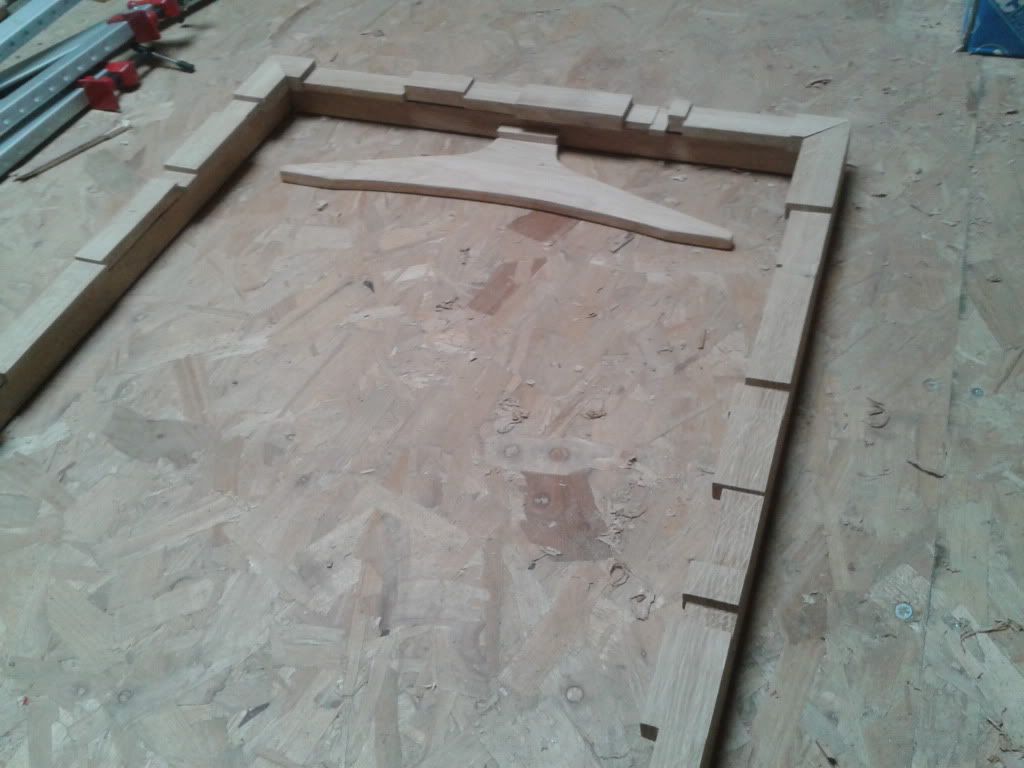
I made an oak hanger for the shirt which was fixed from the inside to the top part of the frame.I also added a majority of small holes in the sides of the frame for air circulation so it could breathe easily.

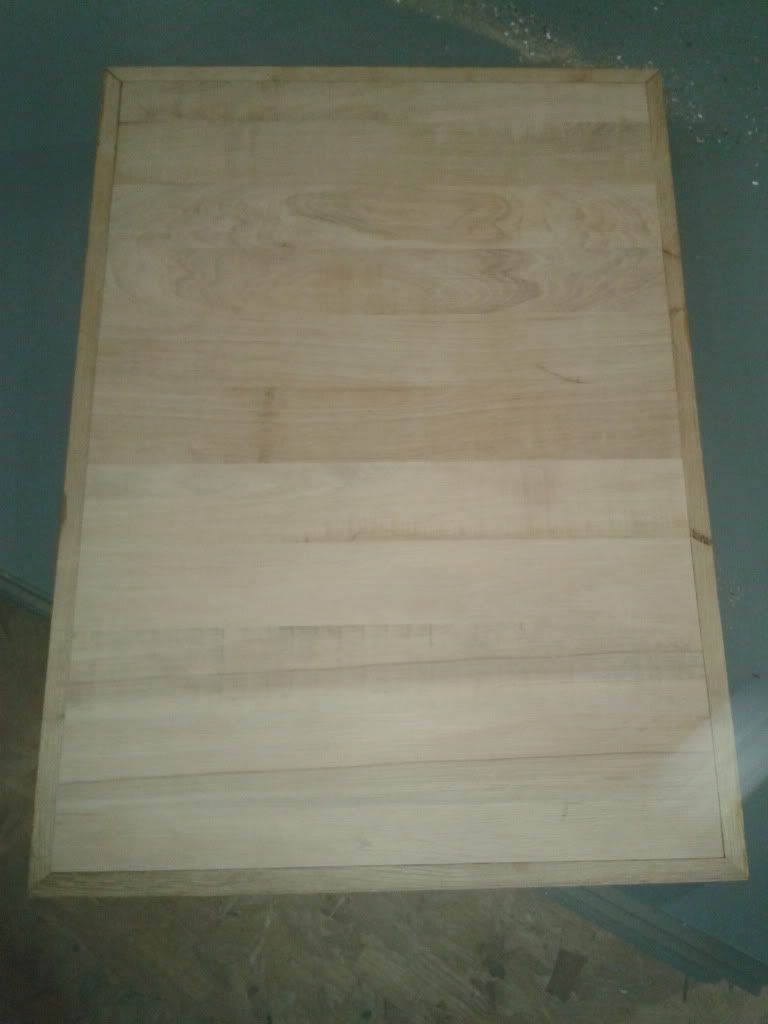
The backing was also handmade using 3mm thick strips of oak which I run down in a table saw to the thickness required and made them into a panel to fit the frame.


I will share a few photos of the build from the first marking out to the finished piece:


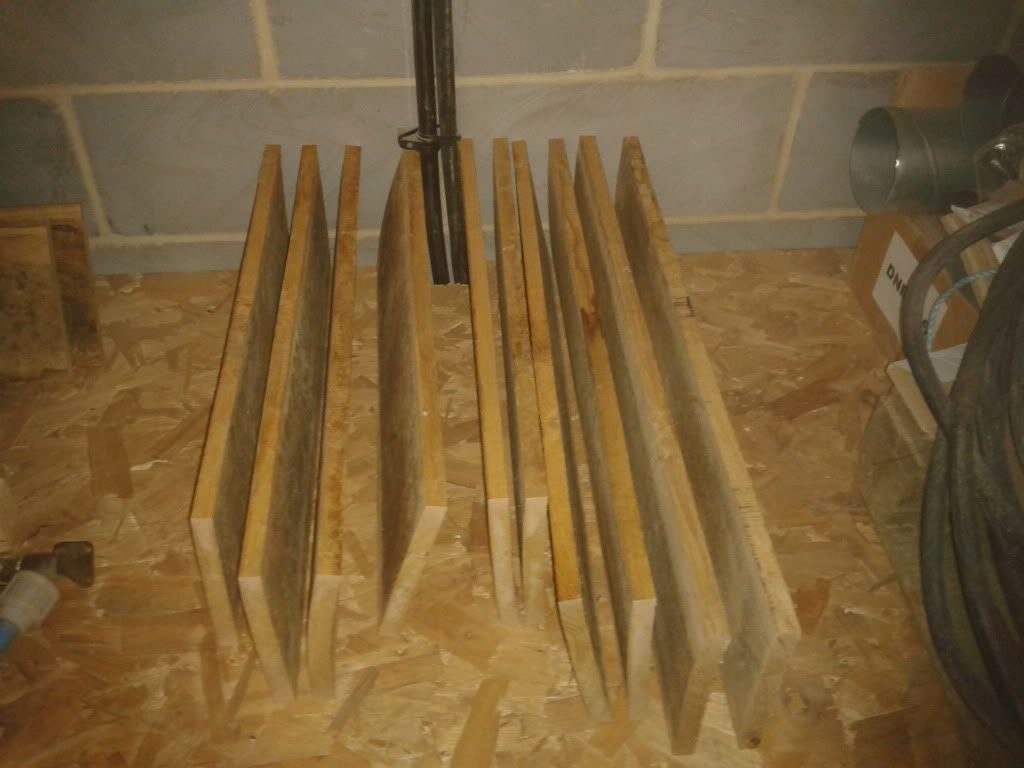
This is what I started with, 4 pieces of oak I prepared to 60mm x 40mm. This is the unique profile marked out and ready for removal.


This image shows the profile cut out, the cube design cut into the oak and the 45 degree angle (no spindle).


A quick test fit for square and angle fitment. This image also shows the cube design quite well.


All the sides rubbed down and edges softened. The oak hanger location being marked out to the frame.


3mm oak backing board panel made and fitted to its place.


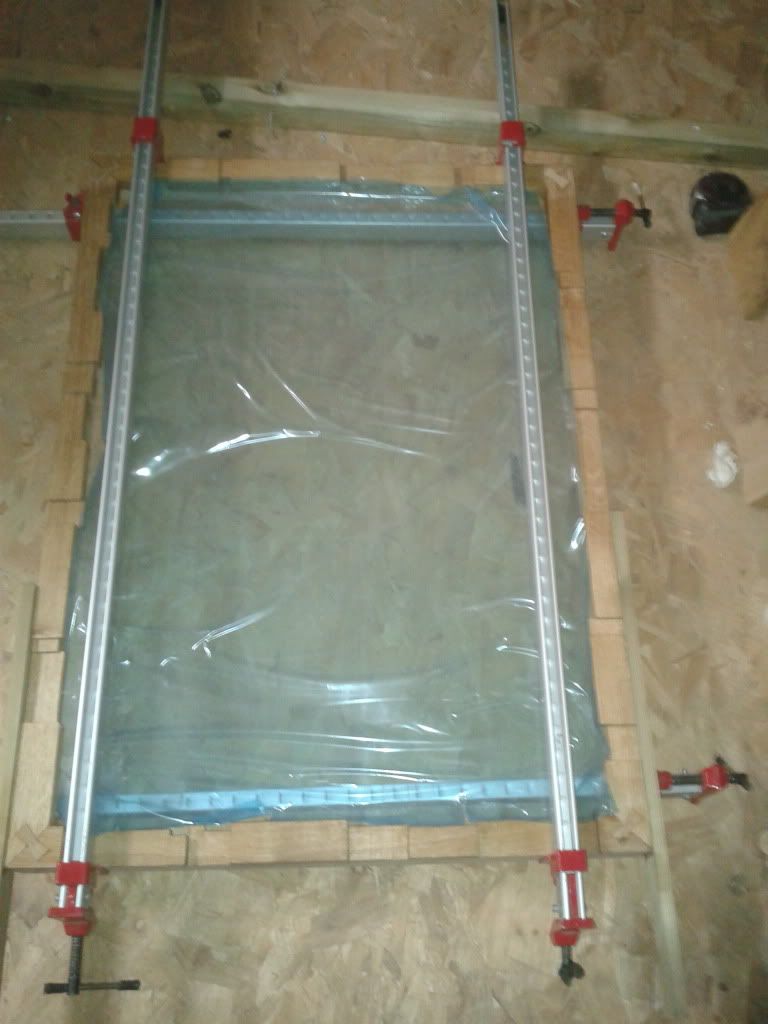
The glue up, clear perspex fitment and butterfly keys driven home.


The finished frame:


                                                          Finished with the shirt mounted, ready for display.


I am so happy with this frame. It is like nothing I've ever seen before. It easily draws your attention straight to it when you enter the room it is displayed in. There has been a lot of praise for this from everyone that has seen it. Pictures really don't do it justice!

It has also had offers made from Norwich City fans which I unfortunately had to turn down. This was a gift for my mum. It is currently hanging in the middle of her living room where it looks completely at home!

Wednesday, 6 June 2012

Solid Oak Chest

Things have been a little quiet from myself for a while unfortunately. Many things have accounted for this including a big shape up in my place of employment, mountians of extra work in said employment, a house move and general life. I am suprised at how quickly time has flown by! I am a little disappointed at myself for letting my oak work live on a back seat and leaving it there for so long.

That time has now come to an end. I am back in the zone and scribbling down ideas and designs I'm going to tackle next and it is a great feeling. Why I let it go for these past few months I do not know!

So about this Oak chest.

I have a good friend that does genuine medieval reenactment and he casually asked if I can make a chest for him to carry all his armour, as he uses a large hold all bag at the moment which is not very authentic. So I agreed I would make him a chest. I set about with a few drawings and joint ideas to which he swiftly said no to. He wanted a very strong square box with a lid sat on top, but... with no joints that could be seen.

I suggested maybe a hidden dovetail joint which is not very 15th century I know, but it will be very strong and not visible like he wants. Downside to this idea was the 45 degree angle which the dovetails are cut into which was not used back then. I went through all the basic box joinery with him and he stopped on a lap joint and wanted that, which was easy for me but not very strong at all. So I then suggested fitting dovetails into the lap joint creating a lapped hidden dovetail joint.

A bit complex but ideal for what he wanted. Very similar to the hidden dovetail but modified to fit into a lap joint. The dovetails get hidden from view once fitted tightly together and the box from above looks lap jointed.

If I have lost you with all these joints I apologise. A quick run through with picture of what I did.

I started with these lovely air dried boards.


I then ripped down the boards and hand finished the edges for a perfect join and glued them up.


After sanding smooth and cutting to size I then set about marking the lapped hidden dovetails.


An example of how the joint works once chiselled out.


Once everything was cut out, I made the chest base which was cut to size and lap jointed to the bottom of the 4 sides. Everything fitted nice and tight so out came the glue and clamps to glue everything up.


After checking the squareness I letting it all dry over night. The next day came the first coat of oil and making the lid. (sorry no pictures of the lid making)


After everything was complete and 3 coats of oil were applied the end result was this.


The lid was slightly wavy which you can see in the pictures and my friend loved it.

I finished this the day before he took it to his first event this year which was a close call to get it done in time.

The idea I last heard was he wants to fit leather straping for hinges and a buckle type fitting to secure the lid down. I think once the leather is fitted it will totally transform this already very beautiful chest into something very unique which is my ideal finish to a project.

One last thing to do before it is finished. I am trying my hand at wood burning and engraving as he would like his genuine family coat of arms embedded into this chest as it is made to last. This chest might well be passed on through the years which makes me even more proud to have made this.

I will be sure to update this as soon as progress is made to it.

Thursday, 2 February 2012

Finished coffee table.

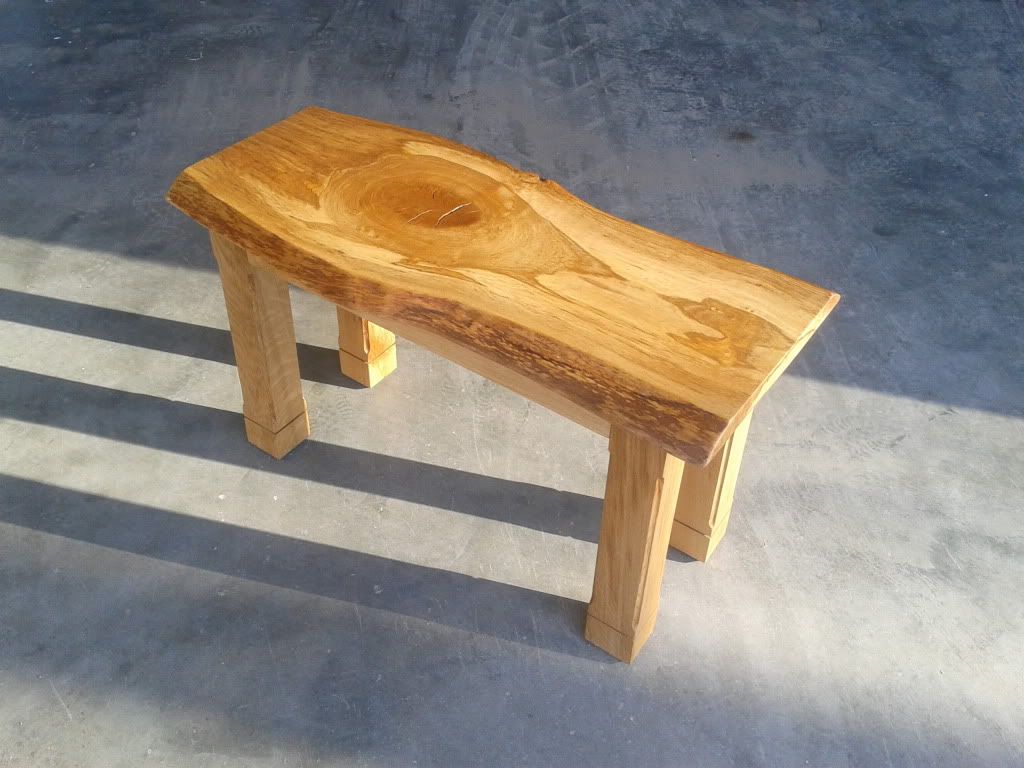
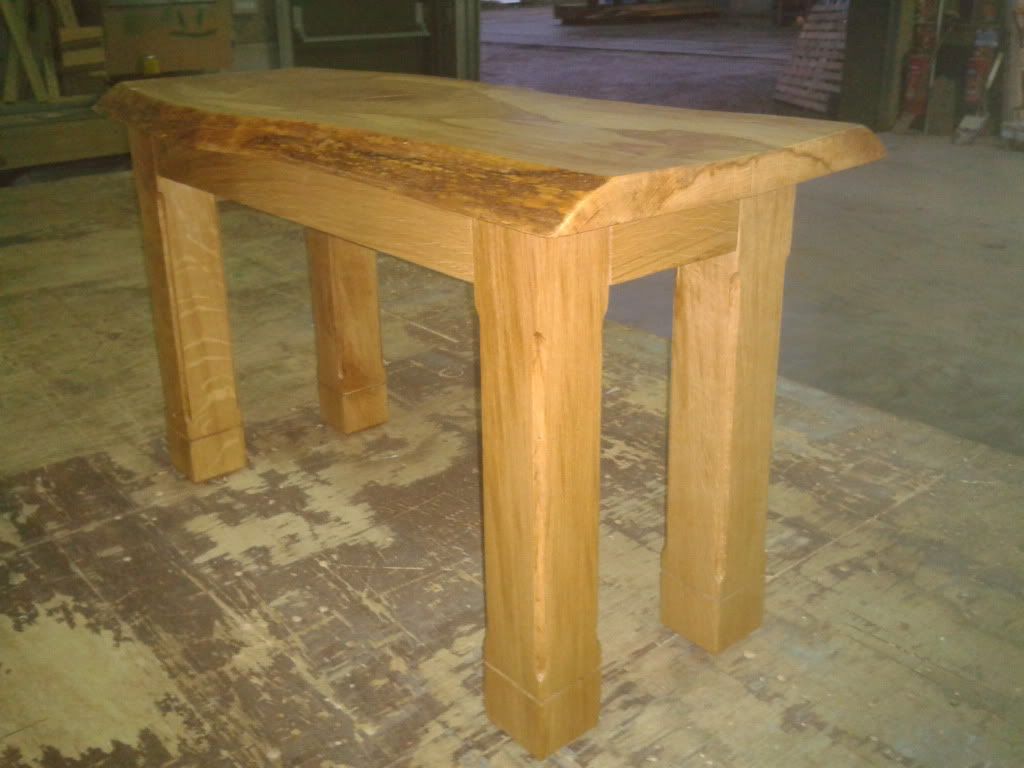
I have completed my most recent coffee table project with amazing results. A simple design with stand out features make this a coffee table that stands out in any room it will be placed. The huge knot that takes over the whole of the top is a gorgeous feature that you just cant help but admire.


You can see in the sunlight that this coffee table is very unique. You can never get these colours and patterns in the same place like this again. The large knot really makes this coffee table. But looking round this piece you will see other amazing lines and colours throughout the whole table.


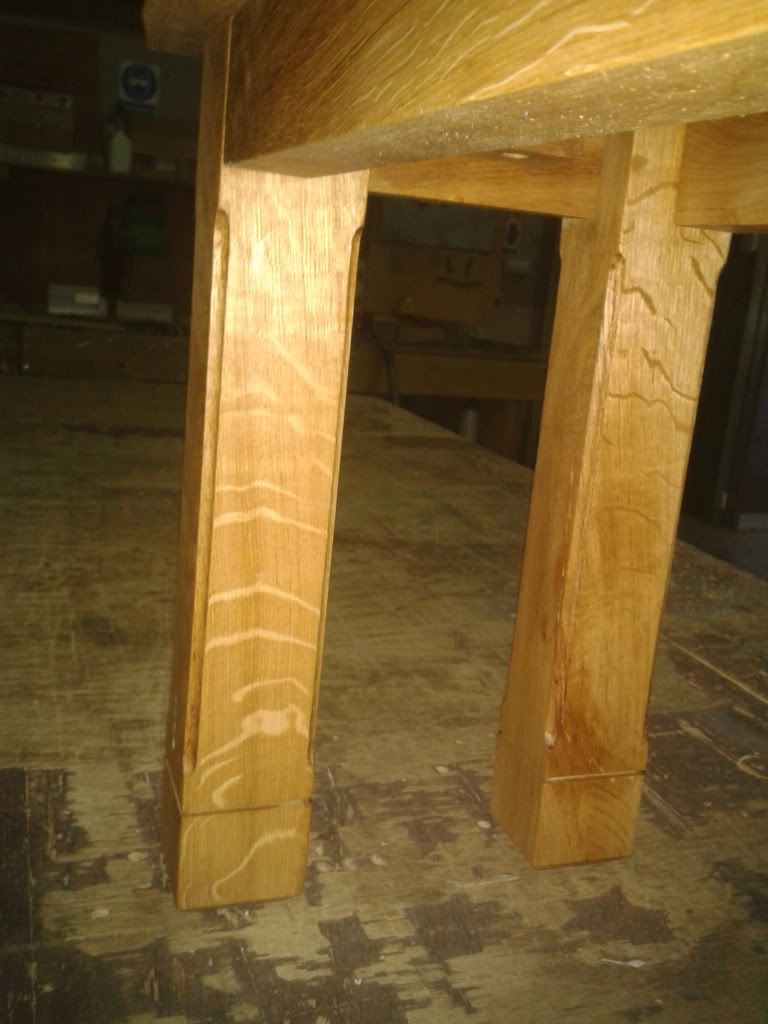
The rounded edges on the legs and angled feet give this table a simple but eye catching appearance. Hand cut mortice and tenon construction makes this a fully solid and sturdy coffee table. The gorgeous whole waney edged top is held down using screw and button method. This allows the top to naturally move without twisting the table out of square.


There are some very beautiful medullary rays (silver grain) running horizontally on the inside of the legs that just add to this tables large list of unique features.

I really enjoyed making this coffee table and I am over the moon with the end result!

Saturday, 21 January 2012

My love of Danish oil


Danish oil is my preferred finish to all my work. This is because the transformation it brings to a piece.

The images below shows what amazing features that danish oil can bring out in the oak. This waney edged coffee table top had many features to show off even before the oil was applied to it, but coupled with the oil the results were outstanding.


With the oil rubbed in with a microfibre cloth, just one coat (there will be 5 in total) transformed the piece with patterns, colours and lines that were unseen until the oil was applied. The golden colour which the oil has also gives off a warm feeling from the furniture once it is completed.


The results of Danish oil still amaze me. I love it and it is a bonus that it is also so easy to use.

Thursday, 19 January 2012

New custom coffee table.

I have been asked to make a coffee table for a colleauge. He picked out and supplied an oak beam to use for legs and rails and a lovely waney oak board with a large knot in it which will be an amazing feature to this table.


The oak beam provided to me needed to be cut up to use for the legs and the rails. I used a table saw to machine to beam down into 4 chunks at 75mm x 75mm. I planed two faces flat and square with each other and used these edges with the table saw to cut the other sides of the timber square. I then check everything using a tri square and everything was spot on. The legs were 68mm x 68mm finished size before cutting the design into them. I used the remainder of the oak beam to cut out the rails.


I worked with my colleauge to design the table to his liking. He was certain on the design of the leg as it was his own. Plain rails was what he wanted so no detail on those. I set out marking the mortice and tenons which is the fixing method I am using for the rails to the tops of the legs.


After a lot of mallet and chisel work the mortices were chopped out and the tenons fit nice, tightly and all square. I placed the table top on the constructed legs and rails to give an idea of what the coffee table will look like when it is finished. The height was perfect and my colleauge is over the moon with it. I have some sanding left to do, glue the rails and legs together, 4 x buttons to make to fix the top to the rails and a generous 5 coats of danish oil which will bring out the beautiful lines and markings of this piece. There are many, many medullary rays in this table. Finished images are soon to follow!


Tuesday, 17 January 2012

Oak beam bed frame finished!


 Following up from a post on the 29th December 2011 I am pleased to say that my oak beam bed frame is now completed! I have a few pictures to share of the build and a brief run through of what to picture are.


The 3 pictures you see above are what the oak was like before I began working on it. 150x150 beams and a 35mm thick waney edged board I found and used for a head board. In the last image one of the oak beams releaved some amazing medullary rays (silver grain) once it was sanded down.


The timber rails joining the foot frame of the bed to the head board frame were Ash in stead of Oak. I went for a change when I saw this was available to me and the grain patterns were unreal! I was glad I used this once I saw it. The foot end of the bed was sat on top of 300mm legs which were fixed using mortice and tenons. These were fitted tightly in place and an oak peg was used to hold the joint together.

The last image is to show the design of the bed and to test fit the joints which are mortice and tenons.


The head board joining was hand cut using a tounge and groove fixing method. Once the pegs were driven into the frame joints it pulled the frame tight together sandwiching the head board tightly in between the upright posts to make up the head board frame as seen in the second image of these three.

The last image is the bed frame joint work completed and fitted together. No pegs have been driven in yet so the frame can be taken apart to easy moving. The jobs left to do was to groove out the Ash rails to take for the mattress and pine bed slats. I used pine for a bit of give and flex for under the mattress.

I used 12 slats in total. Each one was 25mm x 100mm spanning the width of the bed frame. This easily supports the mattress with no sagging what so ever.

I gave the whole bed frame a danish oil finish to protect it and to bring out the beauty of the oak and ash.

Sleeping in the bed after getting it home was fantastic. It is as I wanted it to be. A solid, sturdy bed that looks different to anything else. The large beams dwarf everything else in the bedroom and makes a real presence in the room. No movement, no creaking from loose joints and no sleeping in a bog standard bed. Perfect!

From the 6 year dried oak beams to the finished bed frame was all hand made. All joints were worked out and cut by hand. The mortices were cut using a drill and chisels then everything knocked together using a rubber mallet. A belt sander and a drill were the only power tools I used for this whole build. Creating and making something by hand is extreamly rewarding. So happy with this!

Thursday, 5 January 2012

Blogging app for my phone.

I have just found and downloaded a blog app on the android market to see if I can post while working on my projects. Hopefully so I can post to everyone so they can see what I have to do at certain stages of my builds. I hope I can use this app to post regularly!

Thursday, 29 December 2011

Oak beam bed frame

Me and my partner have recently purchased a new matteress and were looking at bed frames but the cost of a nice, decent bed frame nearly made me fall over. I knew I could make myself one that would be bigger, better and constructed to a much higher standard all for cheaper than a half decent frame to buy in the shops. All it would take was the cost of the timber and my time.

I designed an extravagant frame using 150x150 oak building framing timbers and I managed to get timbers, air dried for 6 years at the sizes I needed kindly given to me. I also got some 150x75 Ash which I decided to use for the rails instead of oak. So I have not paid out anything for this bed frame.

Setting out on sanding all the edges down revealed some amazing character including cat paw knots and masses of medullary rays. Working out for all the joints was a task in itself due to the timbers being curved slightly as well as twisted.

I am cutting the mortices and the tenons by hand along with all the timber lengths. The only machinery used will be a belt sander and a drill.

I am at around the 40% complete stage at this moment in time.

This is my main project so updates will be regular and images will follow shortly.

Wednesday, 30 November 2011

Media unit.

I have been slowly but surely making myself a media unit to house all my DVDs and games. While at the same time have areas made to a specific size to fit in DVD players, consoles and a freeview TV box.I have to many DVDs that are just stacking up at the moment and all due to lack of places to put them, hence the reason to make this!

I designed this with maximum room to store everything I needed in a smaller space taking piece. While being nice and different at the same time. The main thing I wanted to try with this was to include oak in its 3 forms. Green, Air dried and Kiln dried. This is to show off the beauty and unique properties this wood offers in all stages of the drying process. I want the green oak to dry quickly resulting in splits and cracks right up against kiln dried oak that wont have these issues. I hope every piece of green oak I use moves and splits. I want this to happen!

A very exciting piece I am creating for myself here. Hopefully I can get it finished and started on my mums Christmas present.

Busy busy!

Monday, 28 November 2011

Starting to bring things up together.

Over the last few months I have been trying to create my own basic logo and branding, so I can start building a visual name for my business to get the ball rolling.

As at this moment in time I am in full time employment which doesn't leave me much time in the day to work on my projects as well as use the internet to get traffic to my pages. I try cram as much into the day as I can. I am in the process of making and finishing four projects and I try to work on two of them each day. Maybe concentrating on one at a time will help get them finished and in my etsy shop.

Finishing more pieces will fill my shop that I can start getting potential customers to visit and see my work! Promoting my full shop rather than individual products will be easier I hope.

I think this blog needs a facelift as well and more people coming to it as I don't promote this as much as I should.

So the ball is starting to roll ... slowly. But this is just the start!

Monday, 7 November 2011

Etsy Shop now open!

My unique handmade solid oak furniture is now available to buy direct from Etsy.

My shop is http://ryondesign.etsy.com

Check back often to find new items for sale.

Social networks!

I best add my information of my presence on social networks.

Facebook - Ryon Design

Twitter - @RyonDesign

Like/Follow me to see items currently in production and all my plans and ideas. Get your name down before anyone else for something you like before it goes up for sale!

New Gallery Pictures

I have another coffee table in my gallery. This one is a definite one of a kind piece. Everything you see on the gallery page now is available to be made. Remember no two pieces will ever be the same and I want to keep my products as one of a kind pieces. Similar... but never the same.

As they are made to order anything and everything can be custom. Length, Width, Height, Finish, even the Design if need be.

Think of anything you want made. You know that you will never find what your thinking of in the shops. I could make those thoughts reality. That's what I want to do! I don't want to make bog standard furniture!


Lets create something amazing!

Thursday, 22 September 2011

Solid oak?

The term Solid oak in furniture should be as it sounds... Solid.

But...

I keep finding myself looking at handmade furniture in shops which are listed as a solid oak table or solid oak chairs that are not solid oak. Solid in my mind is made using one whole solid piece of timber, not many strips glued together to form a thicker piece.

This one table I have in mind was listed as solid oak. It was a lovely looking kitchen table, pretty grain patterns, a strong 2" thick top, and straight chunky legs. Very nice. But it was not solid like it says it is. Upon closer inspection every section of it was strips glued together. The whole table and it was £1300. I was a little disappointed to be honest, which I keep finding myself when looking around at "solid" furniture.

Maybe it is just because I know I use fully solid timber for my work and maybe expect things to be the same.

Quality made products will far exceed products of "not so good" quality. If any of you are out and about, have a closer look if you are thinking about buying solid wood items. Maybe you are totally happy with these types are products and if so, Fantastic. But just keep an eye out for things that are not what they say they are.

Saturday, 3 September 2011

Frankenstein furniture.

As well as wanting to make gorgeous new oak furniture from scratch I have recently started thinking up ideas which will combine many pieces of furniture together to create something different. Not necessary beautiful furniture, again just going with a different feel.

I will soon be setting myself a small challenge to have a go at this idea. I am thinking everything I will use must be pre owned and only obtained at places like car boot sales, freecycle or homeless charities like Emmaus. A small amount of cash per project and a limited number of pieces to use.

So for example. I will have £20 to get 3 pieces of furniture from Sundays car boot sale. Then create something by combining them all together.

I am thinking this side of what I'm creating only using recycled materials. Nothing new at all. Apart from glue and maybe fixings!

Some very crazy things running through my head with this in mind at the moment! Lets get this started!

Wednesday, 13 July 2011

Coat Rack

After only just noticing that me and my partner have an ever increasing pile of coats laid across the top of our shoe chest in our hallway I thought the time has come to make a coat rack. I wanted to make something quick, simple, different and interesting. It didn't take me long to cut and shape something out. I chose a dried 30mm thick oak board with an attractive grain pattern. I shaped the corners different from each other also for something unusual. This is what I came up with:


Once sanded smooth I decided on only oiling the raised face side of the oak and the outside edge. A clear wax coat for the rest of it. The idea being a darker warm coloured face sitting on a lighter back. As if the front has been fixed on after.


I had this finished and waiting to go for a good few weeks while trying to find some hooks to use with it. I didn't want to go for new, bright and shiny hooks in a light finish. I was more looking for old, patina, worn, dull. At the start I was thinking a distressed bronze but after seeing a few examples I thought the golden bronze would not suit the look I was going for.

So a darker finish was the way forward. Many charity shop visits and car boot sales later nothing seemed to appear.

I had a massive stroke of luck when speaking with my partners mum about the hooks. She had an old coat rack in the shed with hooks matching what I was trying to find.  They were perfect. I could finally finish this small project that I though would take maybe two days to make, find hooks and put up. It was more like 6 weeks.

I gave the hooks a little scrub in some warm soapy water and dried them off thoroughly before mounting them. I decided on placing the hooks unevenly again for something different. And finally the finished project (before fixing to the wall) photographed by my partner Louise. (See her blog here http://www.dearestjackdaw.com/ )


Monday, 11 July 2011

Bench refresh.

I was asked by my partners Gran to take a look at her garden bench as she was worried about it collapsing if someone sat on it. Sure enough it wouldn't have taken much for it to collapse under a little weight. The bench itself had two cast iron ends with wooden slats bolted to each of the ends. The slats were rotting at the bolts which meant it was not very safe at all. On top of this many of the slats had been replaced before, but only with softwood.


So I obviously said I would sort it out for her. I didn't want to have it collapse with her sitting on it one day very soon. I showed her what the problem was with it and she gave me permission to do what I wanted.

I had no doubt that Oak would have looked great with the black cast iron ends.

We were invited up for a lovely roast dinner at the weekend so I thought I would get the bench done while we were there and this is the result:


Looking fresh, bright and new. It has made a massive difference to the overall appearance and strength using Oak. I used new stainless steel dome headed bolts and used a wax coating on the end grain to seal it up a little. I left the rest as it was as the oak I used was green. I just scrubbed it with a hard brush and some warm water. I used green oak as the bench is always going to be outside in the elements,so with no finish applied the oak will not require any maintenance and will turn a lovely silver over the years.

I am very happy with the way it has turned out and now safe in the knowing that my partners Gran will have a solid garden bench to sit on with friends while they enjoy the sunshine and the garden.